









📷 How to Add a Photo on your Custom Form
Ascora allows you to enhance your Custom Forms by incorporating photos, either taken directly from a mobile device or uploaded from the photo library. This feature is especially useful for capturing job site conditions, proof of work, or other essential visual documentation.
This guide will walk you through:
- How to insert a photo placeholder into a Custom Form
- How to configure photo fields in Ascora
- How to test and use the photo upload feature in the Ascora mobile app (Android & iOS)
By following these steps, you can ensure your forms are structured to capture and display images correctly, improving record-keeping and job documentation.
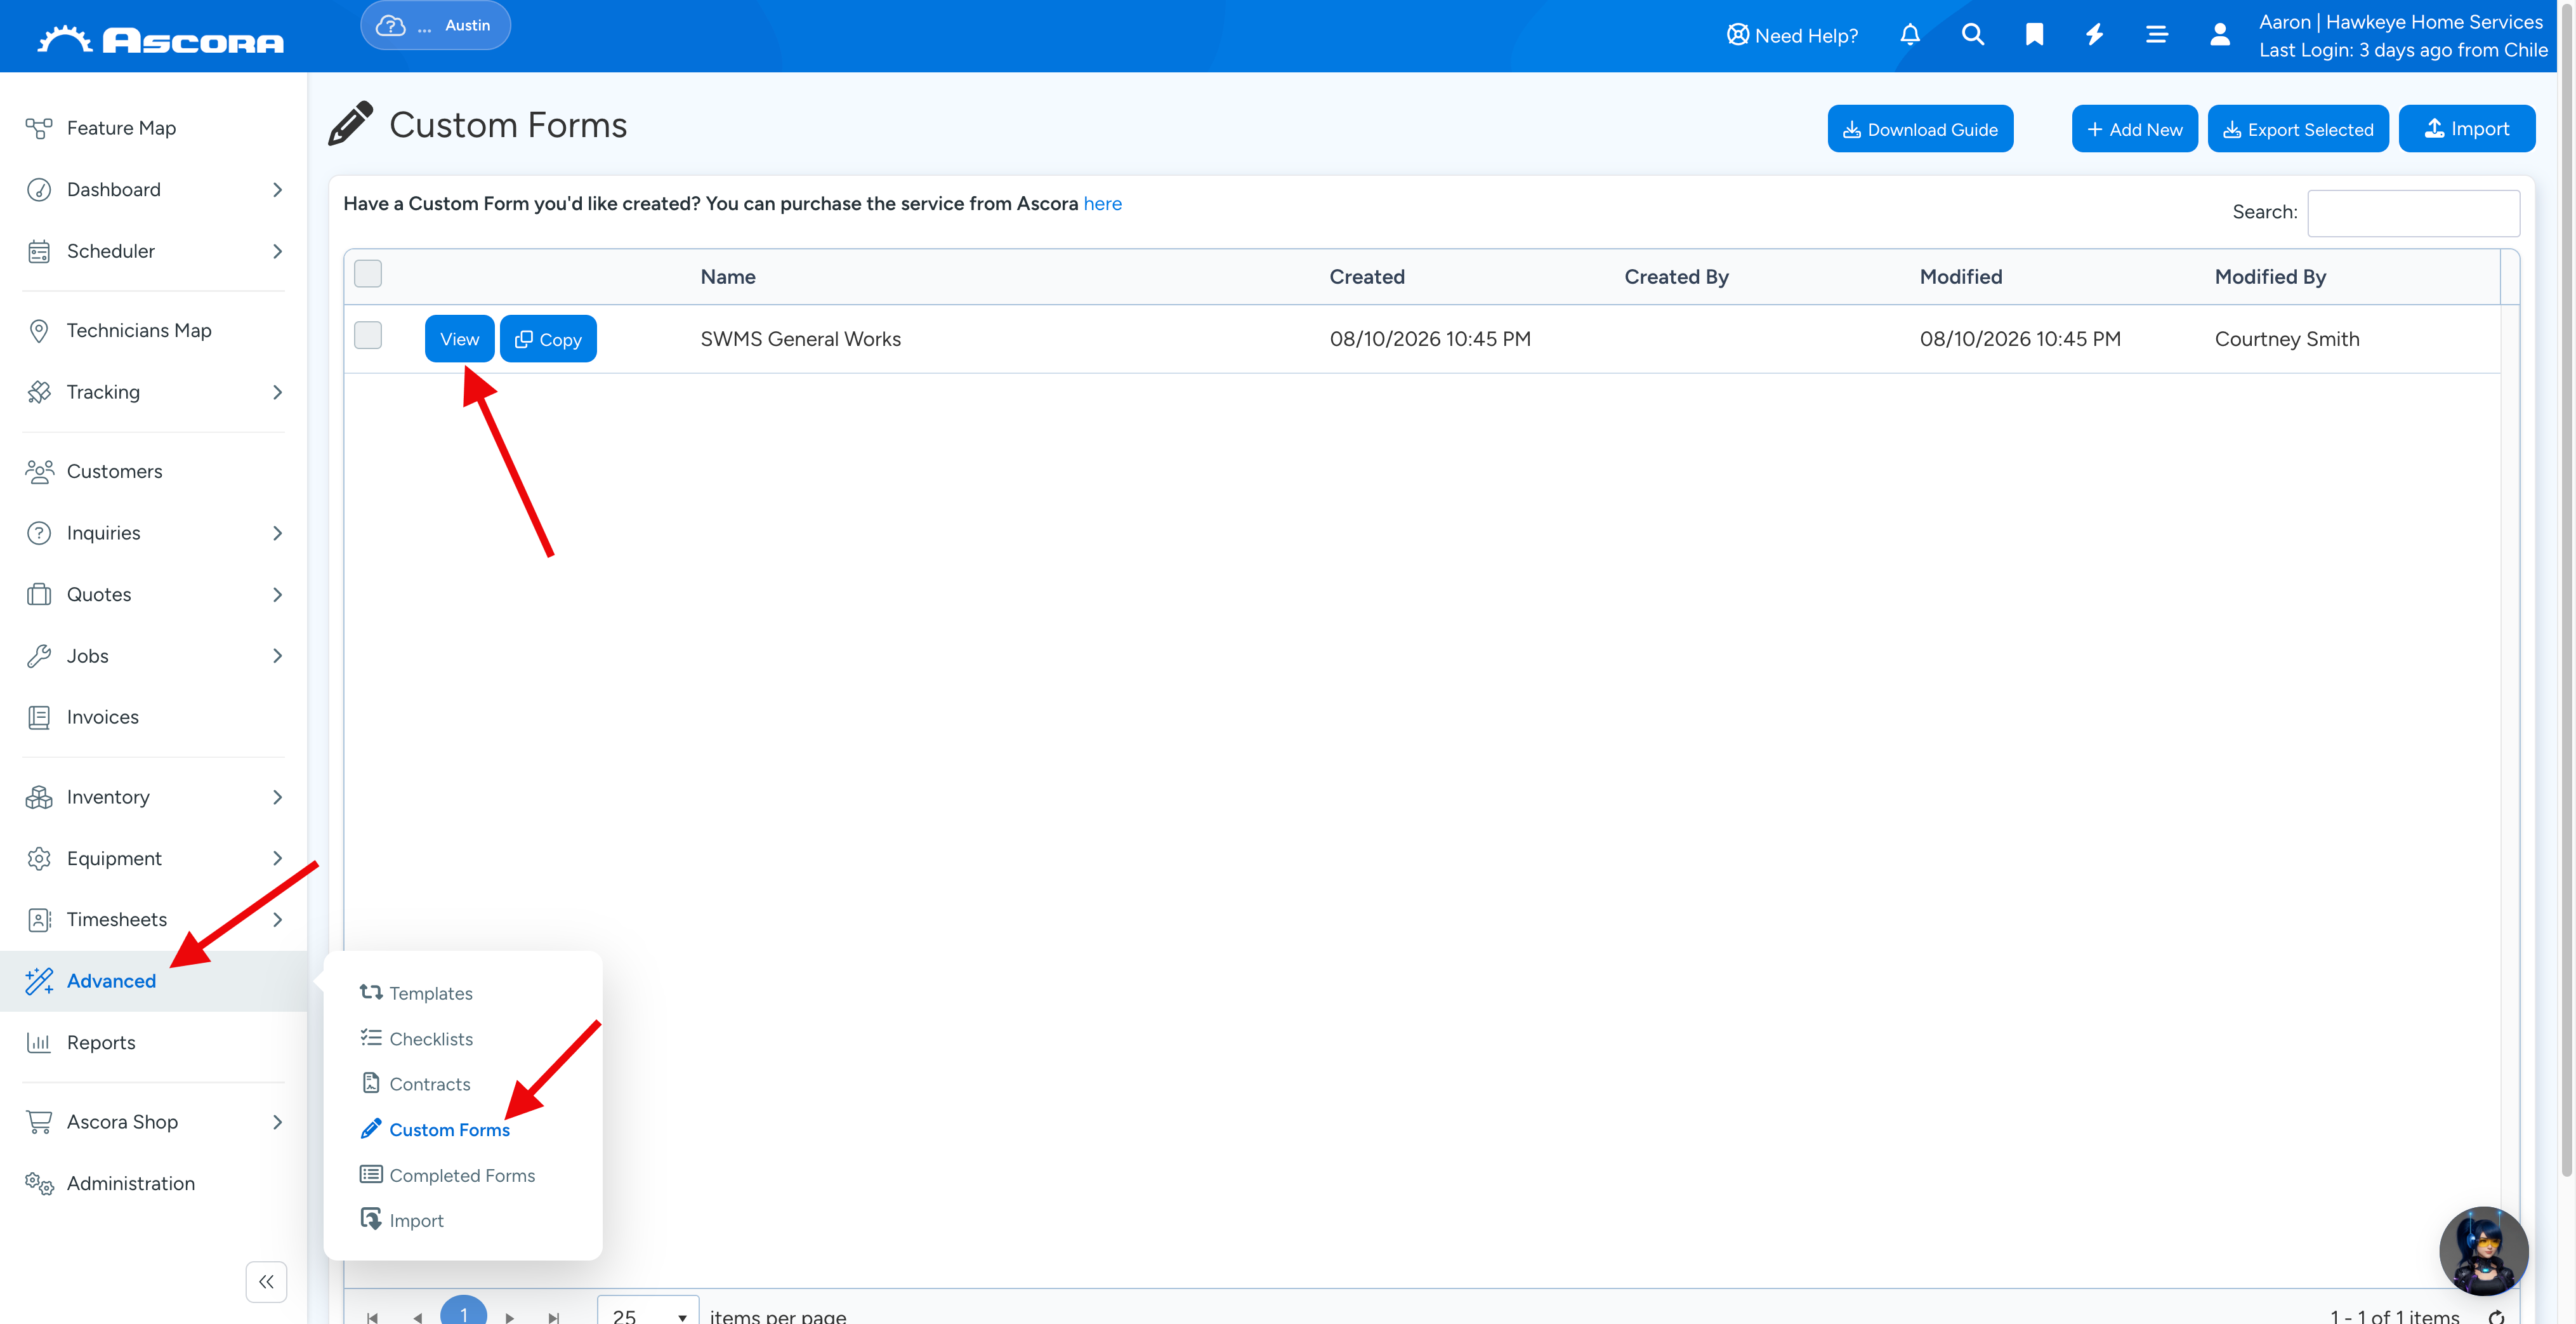
1. Go to Advanced → Custom Forms and click View for the form you want to edit.
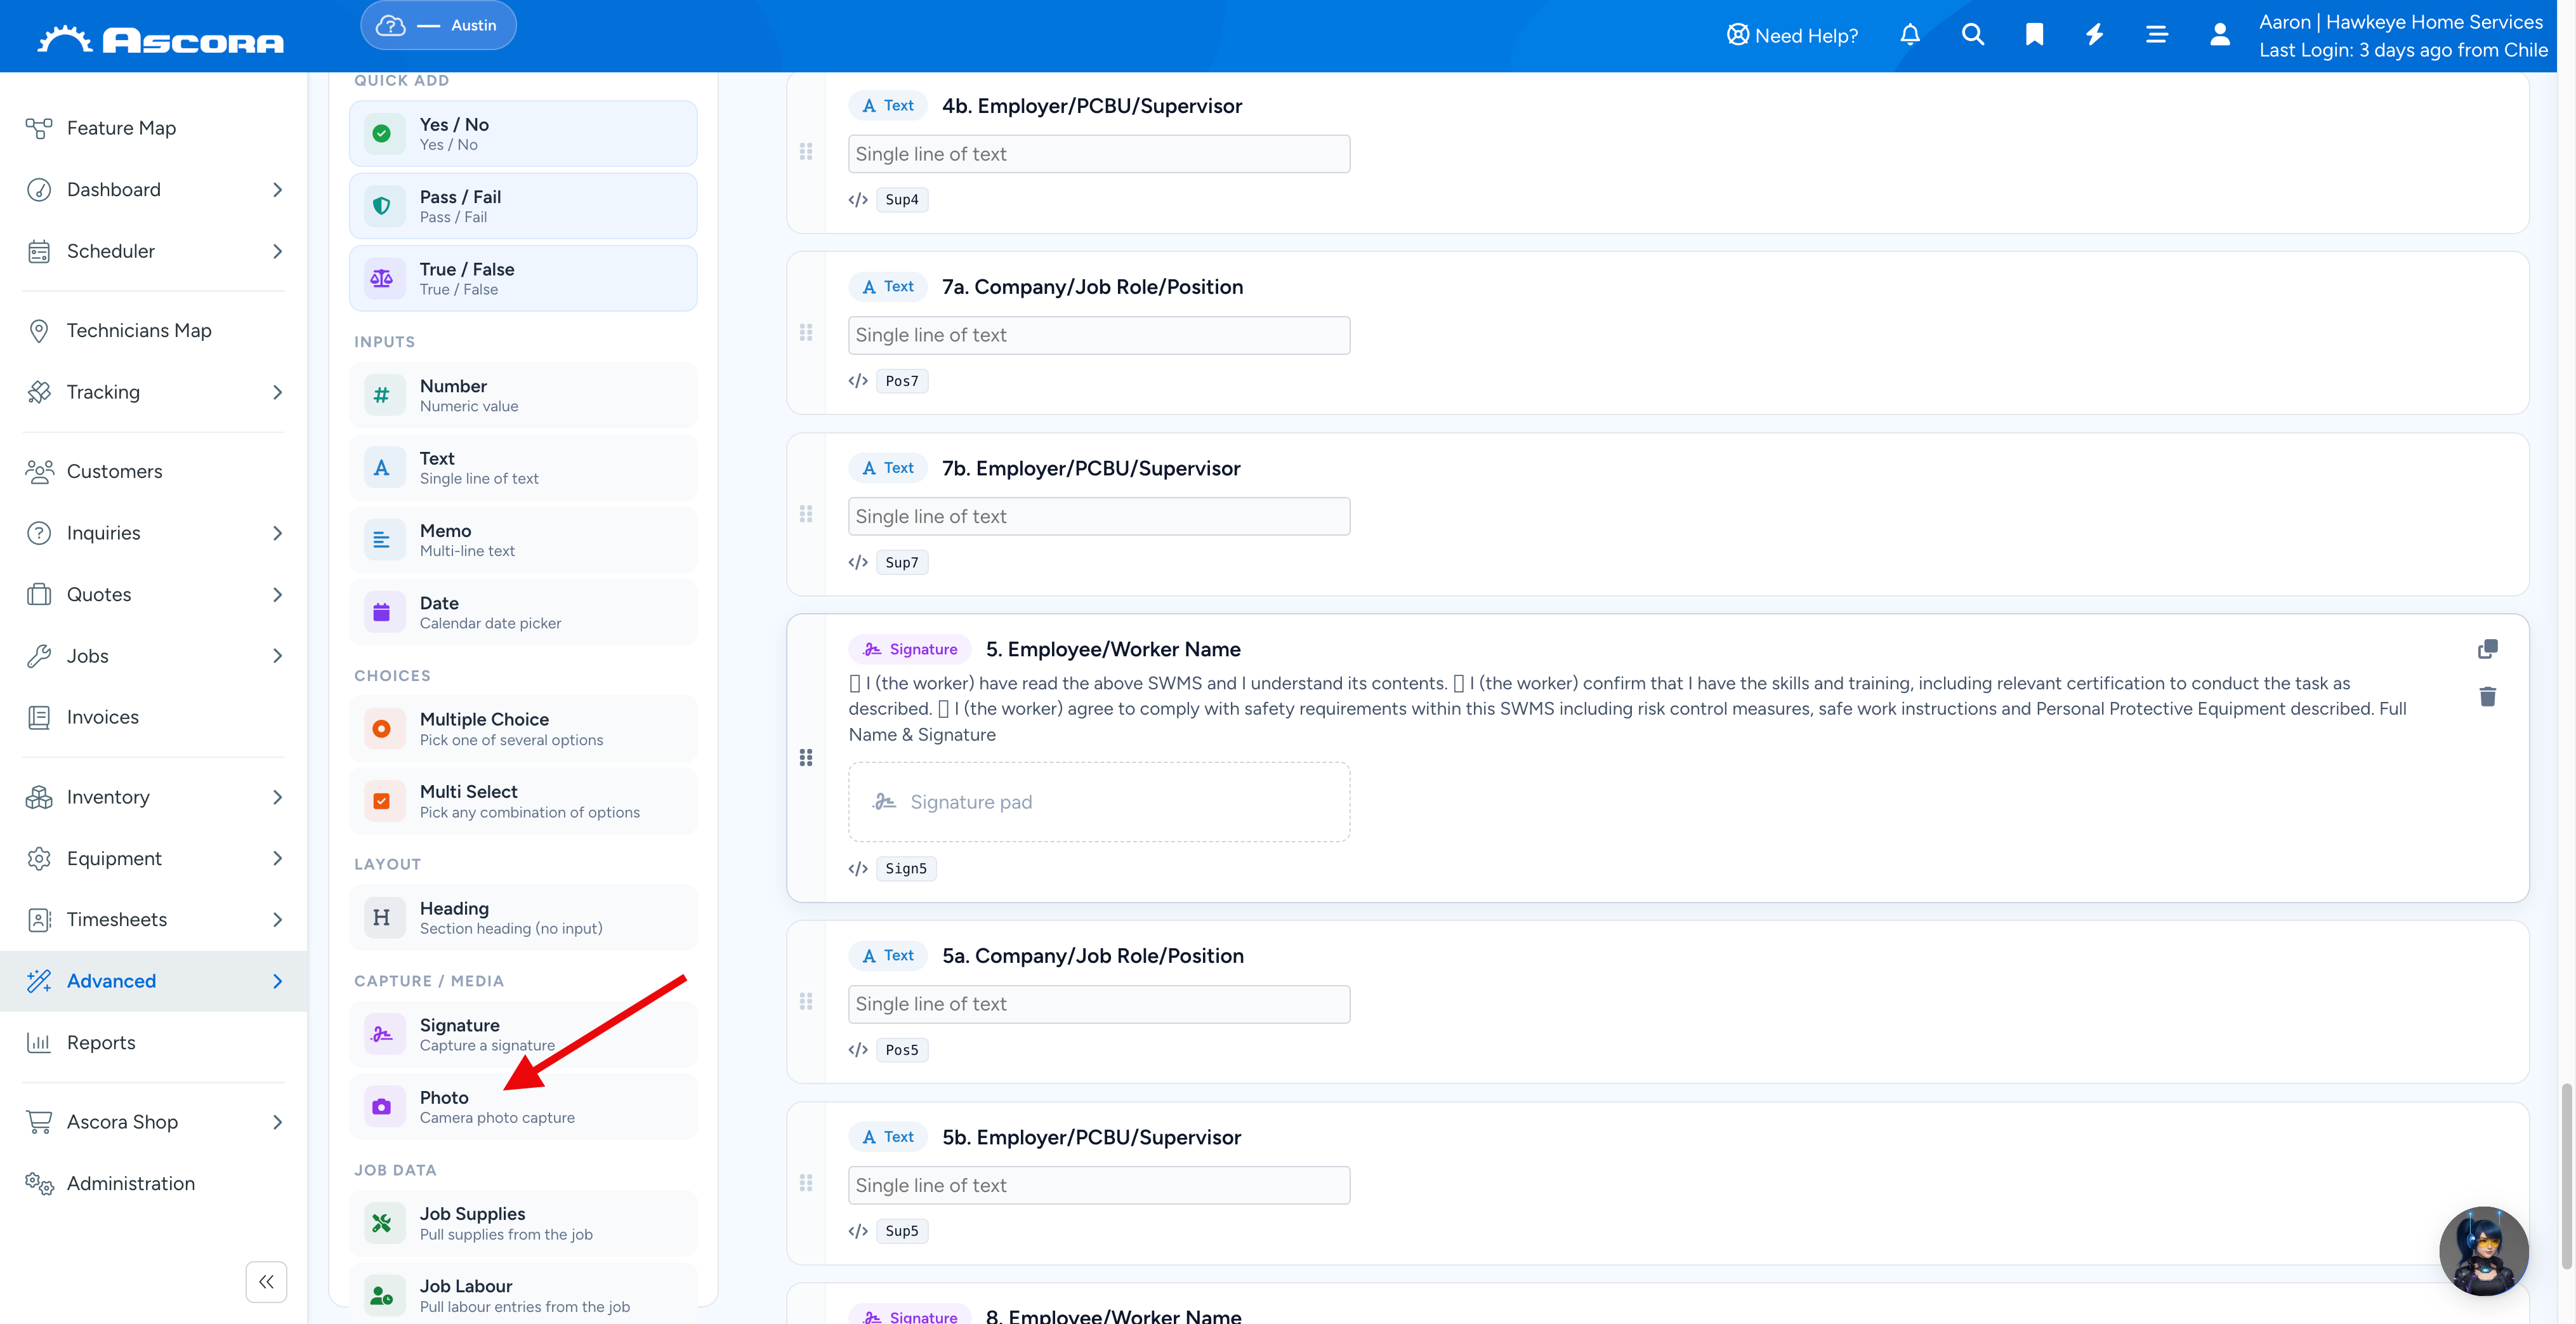
2. Under "Quick Add", select Photo to create the field.
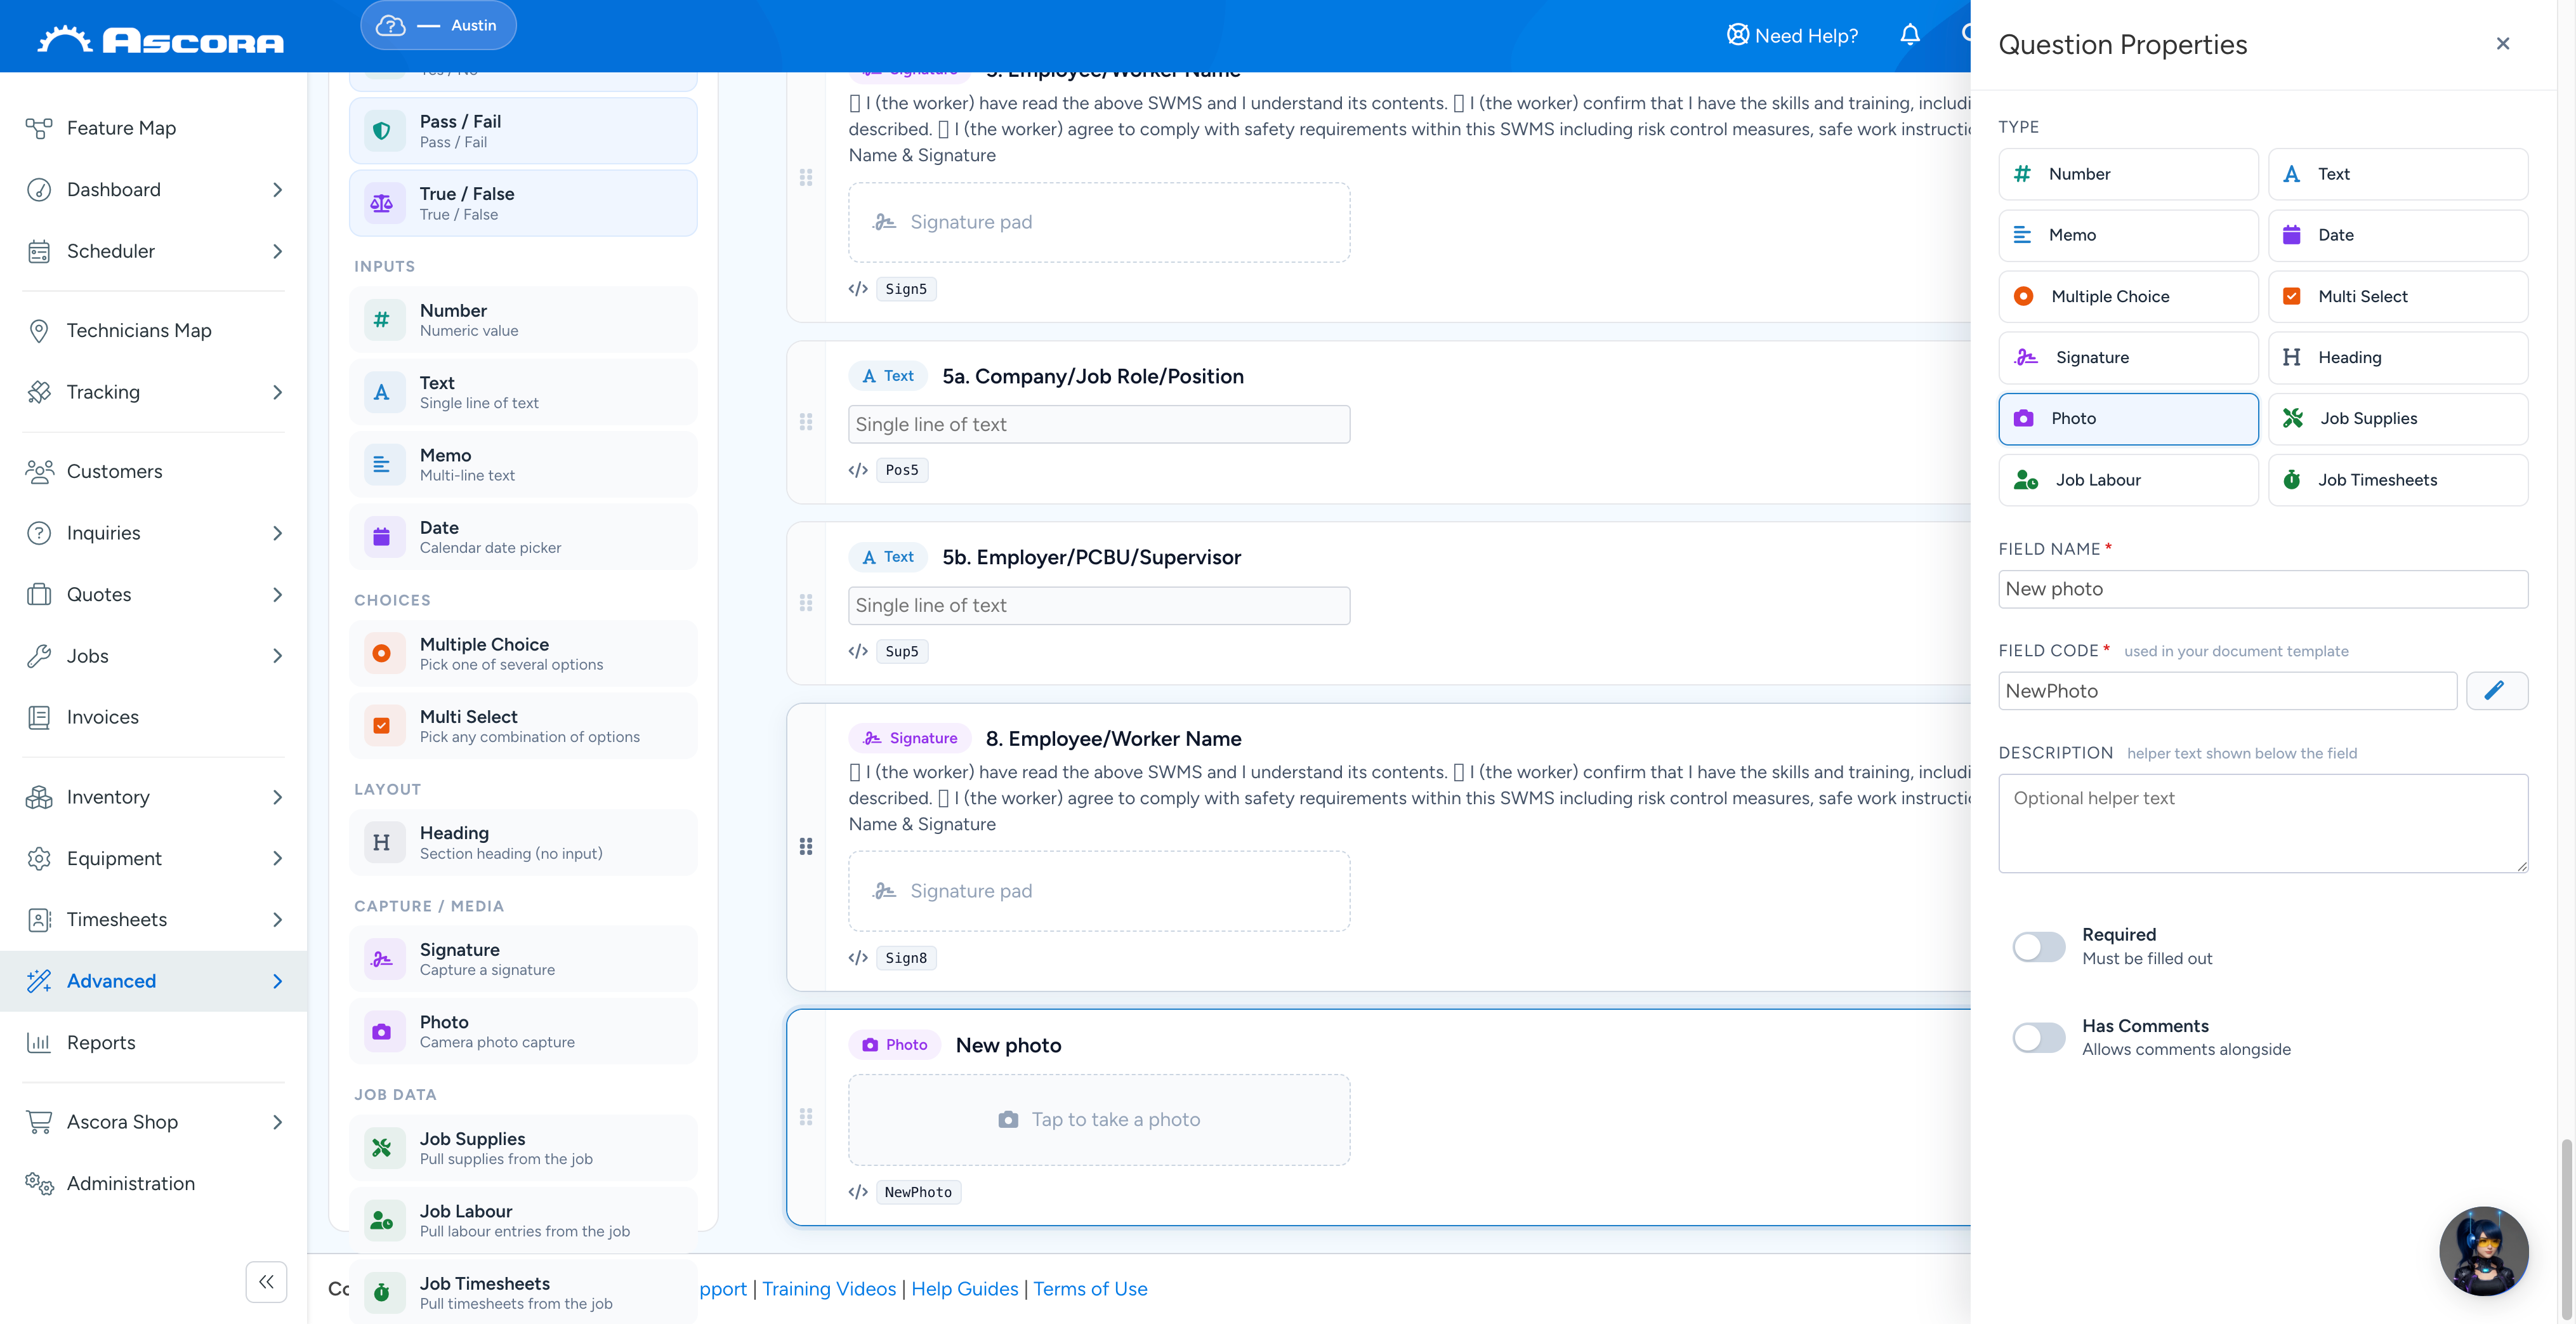
3. Fill out the details of the field and drag and drop it among others to choose its placement.
Testing your Custom Form on your Android Mobile App
Make sure to synchronise your mobile app first before running the test.
1. Access your job from the mobile app.

2. Navigate to Custom Forms tab and tap the + button.
The form that appears should already be the updated version.
Note: Do not use a draft or previously saved custom form to do the testing. Always tap the + button to test a new one.

3. Select the custom form that you need to test and in this example, it's called Custom Form test by Ascora.

4. Once the custom form is displayed, you're able to add a photo by tapping either of the two options.
New Photo - allows you to take a photo from your phone camera and add it to the job.
Select Photo - allows you to select a photo that you may have previously saved in your phone library.

5. When you add photos for the first time, make sure to tap ALLOW when you see the following pop up box.

6. In this example, we tap Select Photo to select one that is already saved in photo gallery.

7. After selecting the photo or adding a new photo, a preview will be shown and to continue, click GENERATE.

8. A PDF file is generated which now contains the photo that we've just added.

Testing your Custom Form on your iPad App
Make sure to synchronise your mobile app first before running the test.
1. Access your job from the mobile app by tapping Menu → Jobs.

2. Tap one of the jobs to access more details and menus. Alternatively, you can use the search button to search for a specific job.

3. Tap Forms button which is located on the left side of the screen.

4. Tap Add button.

5. Search for the Custom Form by typing its name.
In this example, we are accessing the custom form called Custom Form Test by Ascora.

6. Once the custom form is displayed, you're able to add a photo by tapping either of the two options.
New Photo - allows you to take a photo from your phone camera and add it to the job.
Select Photo - allows you to select a photo that you may have previously saved in your phone library.

7. When you add photos for the first time, make sure to tap OK when you see the following pop up box.

8. In this example, we tap Photo Library to select one of the photos that was already saved.

9. After selecting the photo or adding a new photo, a preview will be shown and to continue, click GENERATE.

10. A PDF file is generated which now contains the photo that we've just added.

Note: This PDF form is accessible in Ascora web by going to the Job screen → Attachments tab.

Sub Pages
Got a question?
Submit an Idea
💡 Go to Ideas Portal
Was this article helpful?
Contact support